What is Redis
Redis is a method of caching where frequently requested data is stored directly in the Redis cache on the first visit. WordPress is based on the MySQL Database where data is requested from this database with every visit. When using Redis, there is no need to search the MySQL database again and again for the requested data.
And now in Dutch?
Think of it as a supermarket where nothing is in stock.
The employee (in this case MySQL has to walk to the warehouse each time to retrieve the requested products.
In a large supermarket with many visitors, it will take longer to look for these products.
If these products are already in stock and not in the warehouse then the whole process is a lot faster!
Why Redis?
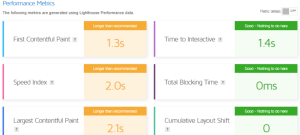
The why is simple: speed!
A beautiful website or webshop that does not load quickly is a huge waste,
because a website that loads quickly is better for your search engine optimization and thus your findability.
Besides, people just want to find what they are looking for quickly.
How do you install Redis within WordPress?
Activating Redis is actually quite simple.
Step 1 is to create a Redis database in the control panel.
Under the heading additional features you will find Redis management.
Step 2 is to enable Redis in the PHP Settings under the Additional features heading “Select PHP Version.”
Step 3 is to place 3 lines of code in wp-config.php You can find this file when logging in via FTP or from the control panel via System info & Files à File manager. Then click on public_html and open the file wp-config.php. Under the heading
Step 4 is to install the Redis plugin for WordPress so that WordPress can communicate with the Redis database we just created. Login to your WordPress website installed in the account.
You can then test the website.
Your website should be much faster now than before!
If your website has not become faster now or the installation fails?
Please send an email to info@wpprovider.nl


